Underarm Laser Results: Your Treatment Timeline

Underarm Laser Results: Your Treatment Timeline

That moment when you realise you have not had to think about shaving your underarms for days is exactly why underarm laser results are such a popular beauty investment. This small area can make a big difference to your routine, whether you are getting ready for a night out, a holiday, the gym or simply want smoother skin with less daily maintenance.

Laser hair removal is not an overnight fix, and the best results come from following a personalised course rather than judging the treatment after one appointment. Here is what realistically happens, when you are likely to see a change and how to get the most from every session.

What underarm laser results can look like

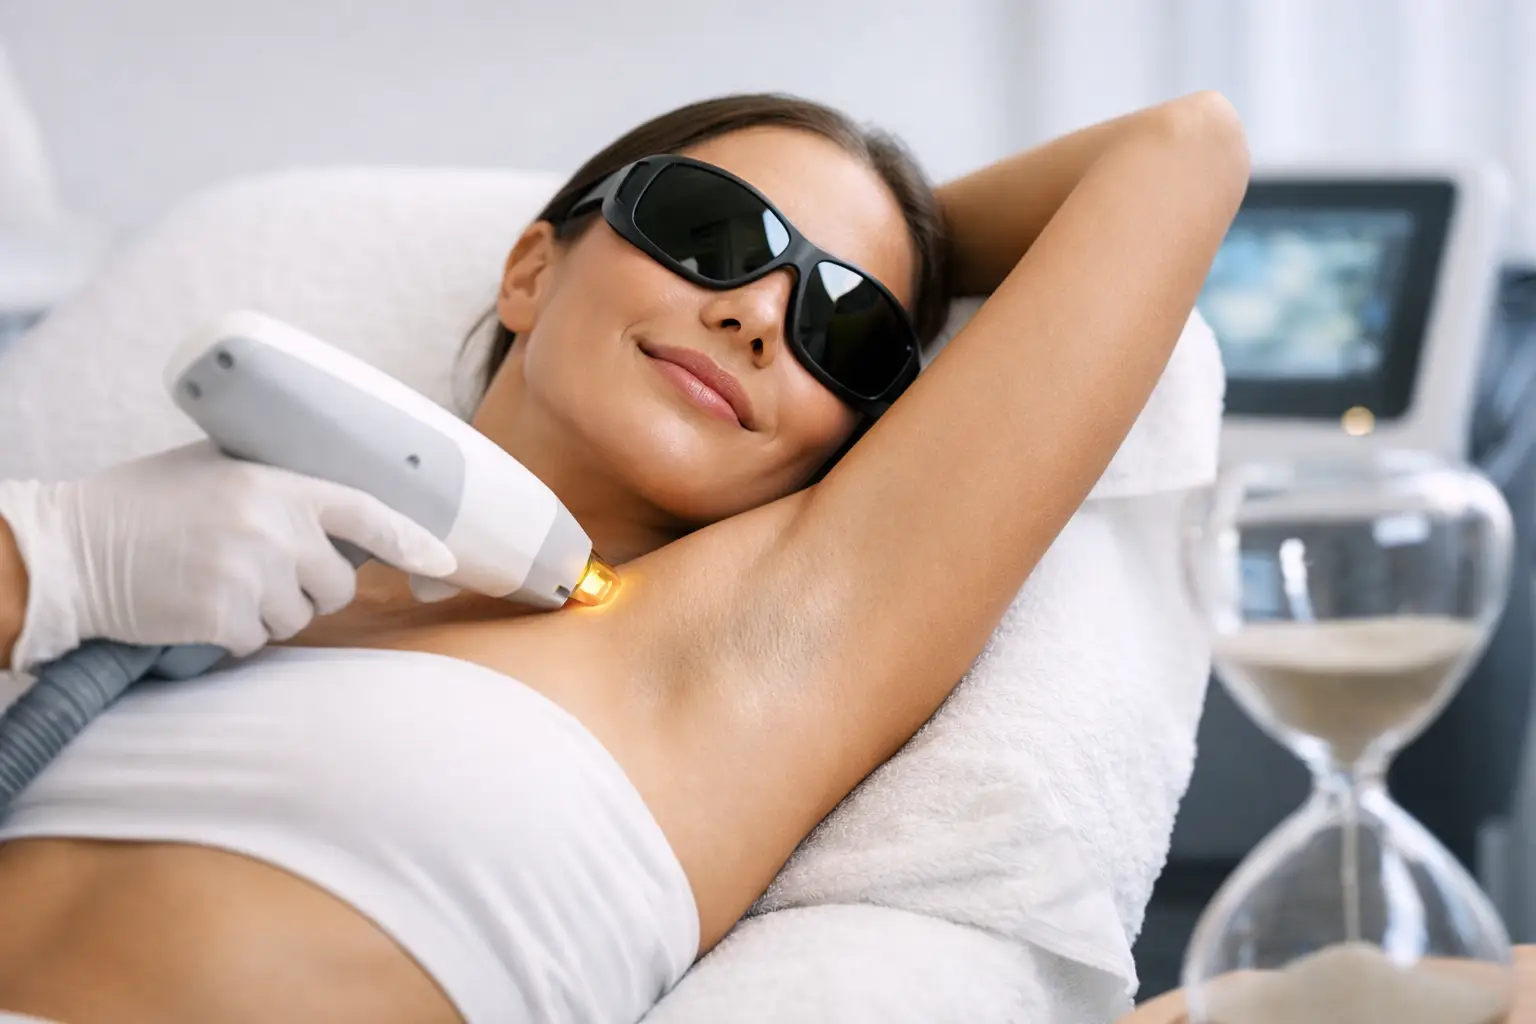
The goal of laser hair removal is a long-term reduction in unwanted hair growth. The laser targets pigment in the hair, sending controlled heat into the follicle to disrupt its ability to regrow. As fewer active follicles produce hair, underarms can look and feel smoother, with reduced density and less visible shadow.

Many clients notice that the hair returning after their first treatment feels finer and grows more slowly. This is encouraging, but it is not the finished result. Hair grows in cycles, and laser treatment is most effective when a hair is in its active growth stage. At any one appointment, only some of the hairs in the area will be in that stage.

After a full course, results often include significantly less hair, longer periods of smoothness and easier upkeep. Some clients find that occasional top-up sessions are enough to maintain their preferred finish. Individual outcomes vary depending on hair colour, hair density, skin tone, hormones and how consistently appointments are attended.

Your underarm laser results timeline

After your first session

You may see small dark dots or what looks like fresh stubble in the days following treatment. This does not mean the laser has failed. Treated hairs can take one to three weeks to shed, and gentle exfoliation after the skin has settled may help them release naturally.

Some redness, warmth or slight swelling around the follicles can also happen straight after treatment. It usually settles quickly. The underarm is a sensitive area, so keep it cool, clean and free from fragranced products if your skin feels irritated.

After two to four sessions

This is when many people begin to notice a more obvious difference. Regrowth may appear patchier, lighter or slower, and the amount you need to shave between appointments can reduce. If you are used to shaving every day or every other day, this stage can feel like a major upgrade.

Do not be tempted to stretch your sessions too far apart because the hair looks better. Your practitioner will recommend a schedule designed to catch new hairs as they move into an active cycle. Sticking to it gives you the best chance of building consistent reduction over time.

After six to eight sessions

A standard course is often around six to eight treatments, usually spaced several weeks apart. By this point, many clients see a substantial reduction in visible underarm hair and a smoother appearance overall. The exact number needed is personal – coarse, dark hair may respond differently from finer or lighter hair, and hormonal changes can influence regrowth.

Laser does not promise that every follicle will disappear permanently. Think of it as a treatment that can dramatically reduce the time, irritation and frustration involved in hair removal. Maintenance appointments can be useful if new growth appears later.

What affects your results?

Laser hair removal works by recognising contrast between pigment in the hair and the surrounding skin. Darker, coarser hair commonly responds very well, but modern treatment plans can be adapted for a wide range of skin tones and hair types. A proper consultation is where suitability, settings and realistic expectations should be discussed.

Very blonde, grey, white or red hair may be less responsive because there is less pigment for the laser to target. In these cases, your practitioner should be honest about the likely outcome before you commit to a course.

Hormones matter too. Conditions and life stages that affect hormones can encourage new hair growth, even after a successful treatment course. This does not make laser pointless – it simply means you may need maintenance more often than someone whose hair growth is stable.

Consistency also has a direct effect. Missing sessions, tanning between appointments or using methods that pull hair from the root can interfere with your progress. The treatment plan works best when the follicle is present, the skin is protected and every session is timed properly.

How to prepare for the best underarm laser results

Preparation is simple, but it is not optional. Shave the treatment area as advised before your appointment so the laser can focus its energy below the skin rather than on visible hair. Avoid waxing, threading, tweezing and epilating for the period your practitioner recommends, as these methods remove the root needed for treatment.

Avoid sun exposure, tanning beds and fake tan before your session. Tanned skin can increase sensitivity and may mean your treatment has to be postponed or settings adjusted. Tell your practitioner about any changes to your medication, skincare, health or pregnancy status before each appointment, as some medicines can make skin more reactive to light.

On the day, arrive with clean underarms and skip deodorant, perfume and fragranced body products unless your clinic has told you otherwise. It is a small step that helps keep the area comfortable and ready for treatment.

Aftercare that protects your smooth finish

Your underarms deserve a little calm after laser treatment. For the first 24 to 48 hours, avoid hot baths, saunas, steam rooms, intense exercise and anything likely to create friction or heat. Choose loose, breathable clothing if the area feels tender.

A cool compress or soothing, fragrance-free gel can be comforting if recommended by your practitioner. Avoid deodorant until any redness or sensitivity has eased, particularly products with alcohol or strong fragrance. Do not pick at shedding hairs or exfoliate aggressively. Let the process happen naturally.

Between sessions, shaving is usually fine and often the only hair-removal method advised. If you are heading abroad or spending time in the sun, protect exposed skin and follow the clinic’s guidance carefully. The underarms may be covered most of the time, but sun care still matters if you are wearing sleeveless tops, swimwear or holiday outfits.

Is underarm laser painful?

Most clients describe the sensation as a quick elastic-band flick or a brief burst of warmth. The underarm can be more sensitive than areas such as the lower leg because the skin is delicate, but the treatment itself is usually fast. A skilled practitioner can explain what you will feel, check your comfort throughout and tailor the approach to your skin and hair.

For many people, the short appointment is far easier than repeated waxing, ingrown hairs or the irritation that comes with frequent shaving. If you are nervous, say so at your consultation. Knowing what to expect makes the experience feel far more manageable.

Start your course with expert advice

At Glam Master in Manchester, underarm laser hair removal can fit easily into a wider beauty routine, from waxing alternatives and facials to event-ready lashes and nails. Your consultation is the place to ask about suitability, treatment spacing, expected results and any preparation specific to you.

Smooth underarms are not about chasing perfection. They are about spending less time managing unwanted hair and more time feeling polished in the clothes, plans and moments you actually enjoy. Book a consultation and let a tailored treatment plan do the hard work.
Soprano Titanium Laser Review: Is It Worth It?

Soprano Titanium Laser Review: Is It Worth It?

A Soprano Titanium laser review usually comes down to three questions: does it hurt, does it work, and is it worth committing to a course? For clients tired of shaving, waxing, ingrown hairs and last-minute grooming before a holiday or night out, the appeal is obvious. This is a professional laser hair removal treatment designed to make appointments more comfortable while working towards long-term hair reduction.

The right answer is personal. Your hair colour, skin tone, treatment area, hormone profile and consistency with appointments all influence the outcome. But if you want smoother skin with less maintenance, Soprano Titanium is one of the laser systems worth considering. For consultations and appointments, visit our Laser Hair Removal Manchester service page.

What is Soprano Titanium laser hair removal?

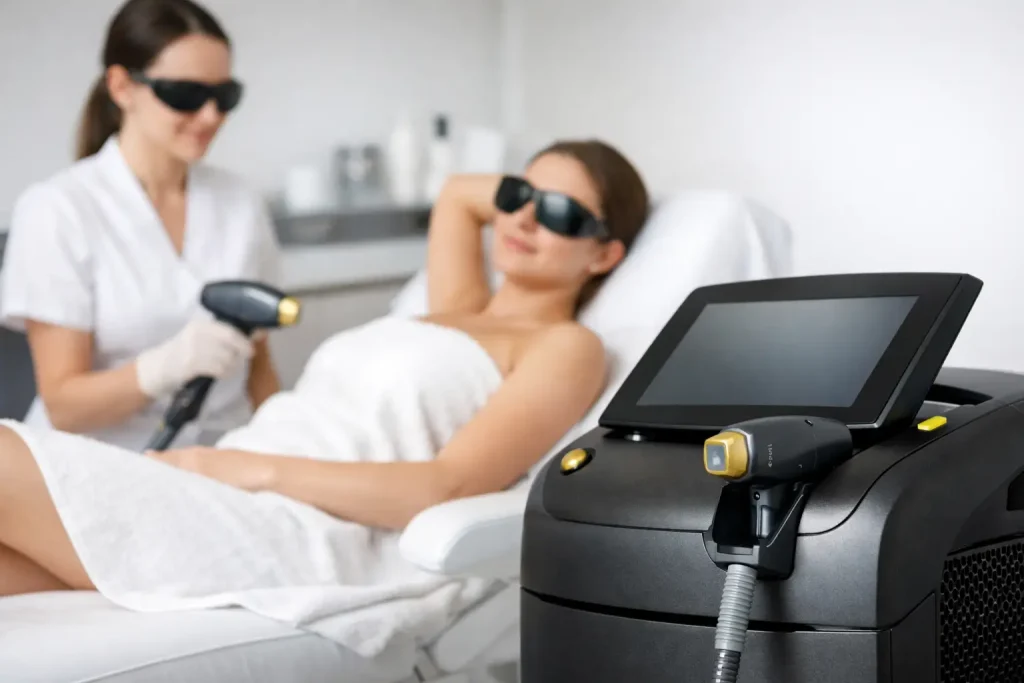
Soprano Titanium is an advanced laser hair removal platform that uses three wavelengths in one treatment. Rather than relying on a single laser setting, it is designed to target hair at different depths within the skin. The aim is to heat the hair follicle while keeping the skin surface comfortable with built-in cooling.

The treatment works by directing light energy towards the pigment in the hair. That energy converts to heat, damaging the follicle and reducing its ability to grow new hair. Hair needs to be in the active growth phase for laser treatment to be most effective, which is why a course of sessions is needed rather than one appointment.

This is not the same as waxing. Waxing removes the visible hair from the root, but the follicle remains ready to produce more. Laser treatment is a gradual investment in reducing regrowth and making the hair that does return finer, softer and less noticeable for many clients.

Soprano Titanium laser review: comfort and sensation

Comfort is one of the main reasons clients ask about this system. Soprano Titanium uses contact cooling and a gliding application method, so the treatment usually feels like repeated warmth with a light flicking sensation rather than sharp, isolated zaps. On larger areas such as the legs, back or arms, this can make the appointment feel quicker and easier to tolerate.

That said, “pain-free” is not a promise any reputable clinic should make. Areas with thicker, darker hair or more sensitivity – such as the bikini line, underarms and upper lip – can feel more intense. Your skin may also be more sensitive around your period, after sun exposure or if you have been using certain active skincare products.

A good practitioner adjusts the treatment sensibly. They should ask about your comfort, assess the skin’s response and explain what is normal. Temporary redness around the follicles is common after treatment and often settles within hours, although everyone’s skin reacts differently.

Does it deliver visible results?

For suitable candidates who complete their planned course, the most common result is a clear reduction in hair growth. You may notice that hair grows back in patches after the first few sessions, then becomes slower and finer over time. It is satisfying to need fewer shaves between appointments, but patience matters here.

Most people need a course because not every follicle is in the same growth stage at once. Appointments are spaced out to catch new cycles of active hair growth. Body areas are often treated at different intervals from facial areas, where growth can be more influenced by hormones.

Results tend to be strongest on dark, coarse hair because it contains more pigment for the laser to recognise. Blonde, red, grey and very light hair may not respond as well. Hormonal conditions, pregnancy-related changes and medications can also affect growth patterns, so maintenance sessions may be recommended after your initial course.

The best review is not one that promises perfectly hair-free skin forever. It is one that is honest about the goal: significant, long-term hair reduction with the right plan, settings and aftercare.

Who is it suitable for?

Soprano Titanium is designed to treat a broad range of skin tones, but suitability should never be assumed from a photograph or a quick online booking. A professional consultation and patch test are essential. Your practitioner needs to assess your skin type, hair colour, hair density, medical history and recent sun exposure before recommending treatment.

It can be a brilliant option for clients wanting to treat the underarms, bikini area, legs, arms, face, stomach or back. It is especially popular for anyone who regularly gets razor rash, bumps or ingrown hairs from shaving and waxing.

Laser hair removal may need to be postponed or may not be appropriate if you are pregnant, have an active skin infection in the treatment area, are taking light-sensitive medication, have recently tanned, or have used certain prescription skincare treatments. Be completely open during your consultation. It protects your skin and helps your clinic create a plan that is genuinely right for you.

What happens at a laser appointment?

Your first appointment should begin with a consultation, not a rushed treatment. You will discuss your goals, health information, previous hair removal methods and any concerns about sensitivity. A patch test is then used to check how your skin responds and guide safe settings.

At treatment appointments, the area is usually shaved and cleaned. Protective eyewear is worn, then the practitioner applies the handpiece in controlled passes across the skin. Depending on the area, this may take only a few minutes for underarms or longer for full legs.

Afterwards, the skin may look slightly pink or feel warm. A cooling product can be applied if needed, and you should receive clear aftercare advice before you leave. At Glam Master, this consultation-led approach helps clients feel informed before they commit to a course.

How to prepare for the best result

Preparation is simple, but it makes a real difference. Shave the treatment area as advised before your appointment so the laser energy is focused beneath the skin rather than burning visible surface hair. Avoid waxing, threading, plucking and epilating for several weeks beforehand, as the follicle needs to remain in place for laser treatment to work.

Keep the area out of strong sun and avoid fake tan before your session. Arrive with clean skin that is free from heavy body oils, perfume, deodorant or make-up where possible. If you are using retinol, exfoliating acids or prescription products, ask your practitioner whether you need to pause them before treatment.

After your session, treat your skin gently. Skip hot baths, saunas, intense gym sessions and fragranced products for the timeframe your practitioner recommends. Use SPF on exposed areas, particularly the face, because fresh sun exposure can increase the risk of irritation and pigmentation changes.

Is Soprano Titanium worth the cost?

It can be worth it if you see laser as a treatment course rather than a one-off beauty appointment. Add up the time and money spent on razors, waxing appointments, creams and dealing with irritated skin over several years, and the value can become much clearer.

However, the cheapest advertised price is not always the best choice. A quality treatment needs a suitable device, trained practitioners, safe protocols, realistic advice and a personalised treatment schedule. Be cautious of guarantees that sound too perfect, particularly if nobody has assessed your hair and skin first.

The areas you choose also matter. Underarms and bikini are often a popular place to start because they are smaller areas with a noticeable day-to-day impact. Full-body treatment can be a bigger commitment, but it may suit clients who want one polished solution for several areas before holidays, weddings or simply easier everyday grooming.

Questions to ask before you book

Before booking, ask whether a patch test and consultation are included, how many sessions are likely to be recommended, and what the pricing covers. It is also sensible to ask about the qualifications of the practitioner, aftercare support, expected session spacing and whether maintenance may be needed.

Bring up anything that could affect your treatment, including medication, recent tanning, skin changes and hormone-related hair growth. The more honest the conversation, the more confident you can feel about your plan.

Smooth, lower-maintenance skin is not about rushing into the first deal you see. Book a consultation, ask direct questions and choose a treatment plan that makes you feel comfortable, cared for and ready to enjoy the results.

Which Extensions Suit Thin Hair? Our Best Picks

Which Extensions Suit Thin Hair? Our Best Picks

Fine hair can look beautifully soft and glossy, but it can also make every gap, flat root and short layer feel far more noticeable. If you are asking which extensions suit thin hair, the answer is not simply “the longest” or “the thickest”. The right choice should add believable fullness without placing unnecessary tension on your natural hair.

For thin or fine hair, a discreet, lightweight application matters just as much as the quality of the extension hair. A well-matched set can create a fuller ponytail, softer face-framing length or a glamorous event-ready finish. A poorly chosen method can feel heavy, show through at the roots or cause breakage over time. This is why a consultation should always come before a transformation.

Which extensions suit thin hair best?

The best extensions for thin hair are usually lightweight, carefully spaced and fitted in small sections. Most clients do not need a full, extra-thick head of extensions. They need the right amount of hair in the right places, often focused around the sides, ends and crown to make natural hair appear denser.

For many people with thin hair, nano rings, keratin bonds and slim tape extensions are the strongest options. The best method depends on your hair density, your lifestyle, how often you style your hair and whether your priority is volume, length or both. See our Hair Extensions Manchester service for consultation-led options at Glam Master.

Nano ring extensions for discreet volume

Nano ring extensions are a popular choice for fine hair because the rings are exceptionally small. Each extension is attached using a tiny bead that can be colour-matched close to your roots, making the fitting far less obvious than larger ring methods.

They are particularly effective for clients who want fullness without a bulky feel. Because the hair is applied strand by strand, your stylist can place each piece with precision and avoid areas where your natural hair is too delicate. This creates a more natural movement and makes it easier to build volume gradually.

Nano rings do need regular maintenance. As your own hair grows, the rings move away from the scalp and will need moving up, usually every six to eight weeks. They are a great choice if you are happy to keep up with appointments and want a reusable extension option.

Keratin bond extensions for a tailored finish

Keratin bond extensions are fitted strand by strand using a small keratin-based bond. They can be an excellent option for thin hair when applied by an experienced extension specialist, as the bonds are small and the amount of added hair can be fully customised.

This method is ideal if you want a highly natural result with no tapes or rings. The bonds sit close to the root and can be placed strategically to add length and density while still allowing your hair to move freely. They are especially popular for special occasions, holidays and anyone who loves wearing their hair up.

The trade-off is that keratin bonds are not reusable and need professional removal. They are also not the right answer for every fine-haired client. If your hair is very fragile, overly bleached or actively breaking, your stylist may recommend a lighter approach while you focus on restoring condition first.

Slim tape extensions for soft, even fullness

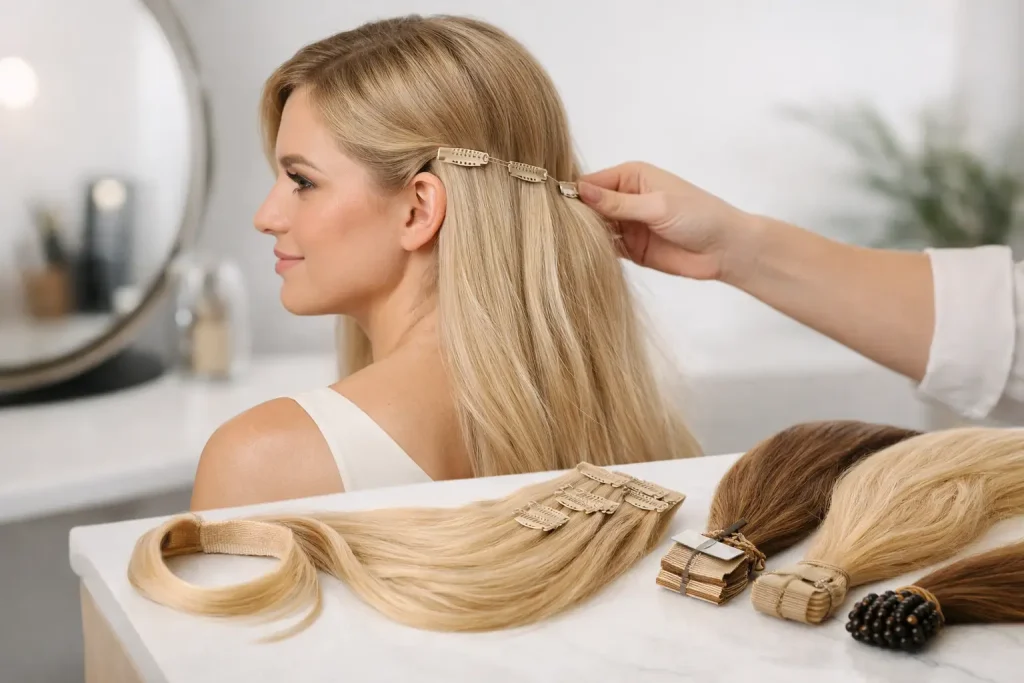
Tape extensions can suit thin hair brilliantly, provided they are slim, high quality and not applied too close to the hairline. The extensions come in fine wefts with adhesive tabs, sandwiched around a small section of your natural hair.

Their main benefit is the way they distribute weight across a wider section, rather than loading it onto a single strand. This can give thin hair a smooth, fuller finish, particularly through the lengths and ends. Tapes are often quicker to fit than individual methods and work beautifully for blunt, polished styles.

However, tape extensions require careful placement. If too many are fitted, or if the tabs are too wide for your natural density, they may be visible when you wear your hair up. They also need moving up as your hair grows, typically every six to eight weeks. For the right client, they can be a glamorous, low-bulk choice.

Extension methods to approach with care

Thin hair does not automatically rule out any extension method, but some styles require more caution. Wide wefts, heavy sew-ins and very thick clip-in sets can put too much pressure on fine strands, especially if your hair is already weakened by lightening, heat styling or tight ponytails.

Clip-ins can still be useful for a one-night transformation, such as a wedding, birthday or party. Choose a lightweight set, avoid sleeping in them and never clip them into fragile areas around the temples. A professional can show you the safest placement for your own hair.

Micro rings are larger than nano rings, so they may be less suitable if your hair is very fine or sparse. They can still work on some clients, but the ring needs enough surrounding hair to remain hidden and supported. Your stylist should be honest if another method will give you a more comfortable, invisible result.

Match the extension goal to your natural hair

The most flattering extension plan for thin hair is rarely about dramatic length alone. Long hair with very fine, wispy ends can look less convincing than a shorter, fuller style. Sometimes adding just a little length and more density through the bottom creates the biggest visible change.

If your hair is thin at the ends but reasonably full at the roots, extensions can add thickness and shape without needing lots of pieces. If your scalp is visible around the parting or crown, your stylist may use fewer extensions and focus on a cut, colour placement and root-lifting styling to support the overall look.

Colour matching is just as important. Fine hair tends to reveal every contrast, so a blend of shades can make extensions look much more natural than one solid block of colour. Soft lowlights, rooted shades and carefully blended tones can create depth, making hair appear fuller before you have even added extra length.

The amount of hair matters more than you think

For thin hair, more is not always better. Adding too many extensions can make the top section look flat while the lower section becomes overly thick. It can also make brushing difficult and increase tension at the root.

A skilled extension specialist will assess your hairline, density, breakage level and how much hair you have at the nape. From there, they can recommend a suitable number of strands, tapes or wefts. The goal is a balanced finish that still looks like your hair, only fuller, longer and more polished.

How to protect thin hair with extensions

Even lightweight extensions need thoughtful aftercare. Brush gently twice a day with an extension-friendly brush, supporting the root with one hand while you brush through the lengths. This prevents tugging at the attachment points.

Use sulphate-free shampoo where recommended, condition the mid-lengths and ends, and keep oily masks or conditioner away from tapes, rings and bonds. Always dry the roots properly after washing. Going to bed with damp extension hair can cause tangling and place extra stress on fine natural strands.

Keep heat styling sensible. Use heat protection, avoid repeatedly passing straighteners over bonds or tapes, and choose low-tension styles where possible. A loose braid for sleep is often kinder than a tight bun or high ponytail.

Most importantly, attend your maintenance or removal appointment on time. Extensions should never be left to grow out beyond the recommended period. If you notice persistent pulling, soreness, matting or slipping, do not try to fix it yourself. Book in for professional advice.

Start with an extension consultation

Thin hair deserves an extension plan designed around its condition, not a one-size-fits-all fitting. At Glam Master in Manchester, an extension consultation gives you the chance to discuss your desired look, your usual styling routine and the methods most likely to keep your hair comfortable and natural-looking.

Bring photos of the length and volume you love, but be open to expert guidance on what your own hair can support. The most luxurious result is not the heaviest transformation. It is hair that feels secure, looks beautifully blended and gives you confidence every time you catch your reflection. BOOK YOUR CONSULTATION and let your fuller-hair plan begin.

How to Protect Coloured Hair Between Salon Visits

How to Protect Coloured Hair Between Salon Visits

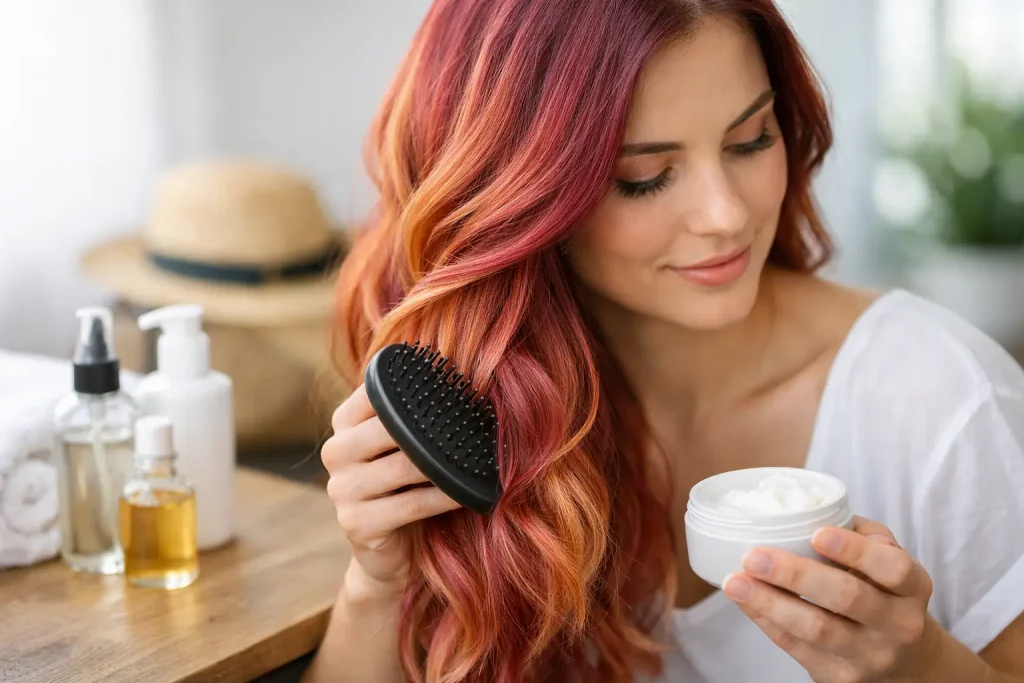
That fresh-colour shine is not an accident. Whether you have chosen a soft balayage, bright blonde, rich brunette or a statement copper, knowing how to protect coloured hair is what keeps your salon result looking expensive long after you leave the chair. Colour fades fastest when hair is over-washed, overheated, exposed to hard water or treated with products that are simply too harsh for it.

The good news is that protecting your colour does not need a complicated 12-step routine. A few well-chosen habits can help your shade stay glossy, your ends stay softer and your next colour appointment feel like a refresh rather than a rescue.

How to Protect Coloured Hair Every Day

Coloured hair needs a little more consideration because the colouring process changes the hair cuticle. When the cuticle is smooth and sealed, light reflects beautifully and your shade appears richer. When it is roughened by heat, friction, chlorine or aggressive cleansing, colour molecules escape more easily and hair can look dull, dry or brassy.

Start with your wash routine. For most people, washing two or three times a week is plenty. If your scalp becomes oily sooner, use dry shampoo at the roots between washes rather than repeatedly shampooing the lengths. Every wash gradually fades colour, particularly vivid reds, coppers, fashion shades and cool-toned brunettes.

Use lukewarm water, not very hot water. A steaming shower might feel relaxing, but it can leave the cuticle more open and encourage colour to fade. Rinse with cooler water at the end if you can manage it. This small change can make hair look smoother and shinier straight away.

Choose a shampoo and conditioner made for colour-treated hair. These formulas are designed to cleanse without stripping hair unnecessarily and often include conditioning ingredients that support softness and shine. You do not need to use huge amounts either. Focus shampoo on the scalp where oil and product build-up sit, then let the lather move gently through the mid-lengths and ends as you rinse.

Be careful with clarifying shampoos. They have a place when your hair feels coated with styling products, mineral build-up or dry shampoo, but they are usually too intensive for frequent use on freshly coloured hair. If you live in a hard-water area, a professional recommendation can help you find the right balance between keeping hair clean and keeping colour bright.

Match your products to your shade

Purple or blue-toning shampoo can be brilliant for blonde, silver and highlighted hair that turns yellow or orange. However, it is not an everyday shampoo for everyone. Overusing a strong toning product can leave some blondes looking dull, overly cool or slightly violet, especially on porous ends. Use it when you notice unwanted warmth, then return to your regular colour-care shampoo.

Copper and red shades are beautiful but naturally quick to fade because their pigment molecules are less long-lasting. A colour-depositing conditioner or mask can help top up the tone between appointments, but it should complement your salon formula rather than replace professional colour. Brunettes may benefit from a glossing treatment to keep their shade deep and reflective, while blondes often need moisture alongside tone control.

Heat Styling Is Where Colour Can Lose Its Glow

Straighteners, curling wands and blow-dries create a polished finish, but daily high heat can dry out coloured hair quickly. When hair becomes dehydrated, it reflects less light and colour can look flatter even if the pigment itself has not changed dramatically.

Always apply heat protection before blow-drying or using hot tools. Make sure it is distributed through the lengths, not just sprayed over the top layer. Then use the lowest temperature that gives you the result you want. Fine, bleached or extension hair usually needs far less heat than thick, resistant natural hair.

Try to avoid going over the same section repeatedly with straighteners. One slow, controlled pass on fully dry hair is much kinder than several rushed passes on hair that is still damp underneath. If you love a sleek finish, a professional smoothing treatment may also reduce how often you feel the need to reach for heated tools. Your stylist can advise whether this suits your hair history and colour goals.

Heat is not only from styling tools. Strong sun can fade coloured hair too, particularly on holiday or during long days outdoors. Wear a hat when you are in direct sun for hours, and use a UV-protective hair product if you know you will be outside. It is a simple way to protect your investment while keeping your hair looking glamorous.

Treat Chlorine, Salt Water and Hard Water Seriously

Pool days are not off limits after colouring, but preparation matters. Chlorine can leave blonde hair looking greenish, make bright colours fade faster and create a dry, rough feel. Before swimming, thoroughly wet your hair with fresh water. Hair acts like a sponge, so if it has already absorbed clean water, it is less likely to take in as much chlorinated pool water.

A swim cap offers the best protection if you are swimming regularly. If that is not your style, apply a leave-in conditioner to the lengths before getting in the pool and rinse your hair immediately afterwards. Follow with a nourishing mask once you are home.

Sea water can be just as drying, especially alongside sunshine and wind. Rinse salt out as soon as possible and avoid leaving wet hair tightly tied up for hours. The combination of salt, tangling and friction can be tough on fragile, lightened ends.

Hard water can also affect how colour looks over time. Mineral deposits may make blonde hair seem brassy, stop brunette tones from looking glossy or leave any shade feeling less clean after washing. If this is a repeated issue, ask your stylist about a salon treatment that removes build-up safely before your next colour service.

Make Moisture Your Colour’s Best Friend

Hair that feels hydrated tends to look healthier, shinier and more polished. For colour-treated hair, a weekly mask is one of the easiest upgrades you can make. Apply it after shampooing, concentrate on the mid-lengths and ends, and leave it on for the recommended time. More product or more time is not always better, so follow the instructions rather than sleeping in every mask you own.

It also helps to understand the difference between moisture and protein. Bleached or heavily lightened hair may need occasional strengthening care because the lifting process affects the hair’s structure. But too much protein can make some hair feel stiff or brittle. If your hair is snapping, feels overly stretchy when wet, or has become difficult to style, it is worth booking a professional consultation instead of buying treatment after treatment.

Silk or satin pillowcases can reduce overnight friction, particularly if you have long hair, extensions or hair that tangles easily. Loose braids can also help protect your style while you sleep, but avoid tight elastics that pull at the same point every night. Use soft scrunchies and vary where you tie your hair during the day to prevent stress around the hairline.

Timing Your Appointments Protects Your Hair Too

Waiting until your roots are very grown out or your ends are badly faded can make the next appointment more complicated. Regular maintenance lets your stylist adjust your formula, refresh your tone and spot dryness before it becomes breakage. The ideal timing depends on your colour.

Root colours often need attention every four to eight weeks, while balayage and softer lived-in colour can usually stretch longer with a toner or gloss in between. High-lift blonde, vivid fashion colours and copper shades may need more frequent toning to stay true. Your lifestyle matters too: regular swimmers, frequent heat stylers and holiday lovers may see faster fading than someone who air-dries and washes less often.

Do not attempt a major colour correction at home when you are unhappy with fading or brassiness. Box dyes, bleach and strong toners can interact unpredictably with previous salon colour, especially on highlighted or porous hair. A professional can assess what is already on your hair and create a plan that protects its condition as well as its colour.

At Glam Master, a hair consultation is the place to talk honestly about your routine, your colour history and the finish you want to maintain. The best aftercare is never one-size-fits-all. A blonde with extensions, a copper bob and a glossy dark brunette all need a slightly different plan.

Your colour should make getting ready feel effortless, not like a daily repair job. Give it gentler washes, intelligent heat styling and the right professional support, then let your hair keep turning heads until it is time for your next fresh salon moment.

How to Prepare for Fillers Before Your Appointment

How to Prepare for Fillers Before Your Appointment

Your filler appointment should feel exciting, not rushed. Whether you are enhancing your lips, restoring cheek volume or softening the look of facial lines, knowing how to prepare for fillers can help you arrive feeling calm, informed and ready for your best result.

Dermal filler is a personalised treatment. The right product, placement and amount depend on your facial structure, skin, concerns and the look you want to achieve. A little preparation gives your practitioner the clearest picture of your goals and gives you time to plan around the short recovery period that can follow.

Start with a proper consultation

The most flattering results are never one-size-fits-all. Before booking treatment, arrange a consultation with a qualified, experienced aesthetics practitioner. This is where you can discuss the area you would like to treat, whether that is lips, cheeks, jawline, chin, smile lines or under-eye hollows, and talk honestly about the result you have in mind.

Bring reference photos if they help you explain your preferred look, but keep them realistic. A photo can show the style of lip shape or level of cheek definition you like, yet your own anatomy will always guide what is safe and suitable. A good practitioner will explain what can be achieved in one appointment and when a subtle, staged approach may look better than adding too much at once.

Use this time to share your full medical history, including allergies, current medication, supplements, previous filler treatments and any history of cold sores if you are considering lip filler. Mention recent dental work, skin treatments and planned procedures too. These details are not a formality – they help your practitioner decide whether treatment is appropriate and how to plan it safely.

Plan your diary before you book

Filler can create immediate enhancement, but it is not always an instant, final-result treatment. Mild swelling, tenderness, redness and bruising can happen, particularly around the lips. Most people can return to normal plans quickly, but it is wise to allow time for the area to settle.

If you are preparing for a wedding, birthday, holiday or major night out, book your appointment at least two weeks beforehand where possible. This gives any swelling or bruising time to resolve and lets the filler settle naturally. For a first-time treatment or a more noticeable change, giving yourself a little extra breathing room is even better.

Avoid arranging filler immediately before a big event simply because you want a last-minute glow-up. The best aesthetic work looks polished and effortless, and that means giving your face time rather than putting pressure on your appointment.

How to prepare for fillers in the week before

In the days before your appointment, focus on keeping your skin calm and your body well supported. Stay hydrated, eat normally and avoid trying a new facial, active skincare product or cosmetic treatment close to your booking. Irritated, broken or inflamed skin may mean your treatment needs to be postponed.

To reduce the chance of bruising, your practitioner may advise avoiding alcohol for 24 to 48 hours before treatment. You may also be asked to avoid medicines or supplements that can increase bruising, such as aspirin, ibuprofen, fish oil, vitamin E, ginkgo and certain herbal products. Do not stop prescribed medication without speaking to the clinician who prescribed it. Your safety always comes first.

If you are having lip filler and are prone to cold sores, tell your practitioner well in advance. Lip injections can sometimes trigger an outbreak, and they may recommend that you speak with your GP or pharmacist about suitable preventative medication.

There are a few occasions when it is better to wait. Filler may need to be delayed if you are pregnant or breastfeeding, unwell, have an active cold sore, infection, rash, spot or wound near the treatment area, or have recently had dental treatment. Your practitioner will advise based on your individual circumstances.

Arrive with a clean, comfortable face

On the day, come to your appointment feeling like yourself. Eat a light meal beforehand unless you have been told otherwise, drink water and wear comfortable clothing. Feeling faint is more likely when you have skipped food or rushed across town on an empty stomach.

Arriving without makeup is ideal, especially if you are having facial filler. It allows the skin to be assessed and cleansed properly. If you need to come straight from work, that is fine – your practitioner can cleanse the treatment area. Just avoid applying heavy makeup afterwards until you have been given clear aftercare advice.

Try not to arrive after an intense gym session, a sauna visit or a boozy brunch. Heat, increased circulation and alcohol can contribute to swelling or bruising. Make the appointment the calm part of your day, then save the high-energy plans for later in the week.

Be clear about the result you want

There is a big difference between wanting fuller lips and wanting a completely different lip shape. Equally, asking for a sharper jawline may call for a different approach than treating loss of volume through the cheeks. Specific goals help your practitioner tailor the treatment, but flexibility matters too.

Think about what you want people to notice. You may want your lips to look more balanced, your profile to appear more defined, or your face to look fresher without anyone being able to pinpoint why. These are useful descriptions because they focus on the overall effect, not just the amount of filler used.

Do not feel pressured to have more treatment than you planned. Beautiful filler should complement your features, not compete with them. Starting conservatively is often the smarter choice, especially if it is your first time. You can review the result once swelling has settled and decide with your practitioner whether you would like further refinement.

Know what happens during the appointment

Your practitioner should talk you through the treatment before starting, including the product being used, the areas being treated, possible side effects, aftercare and warning signs that require urgent medical attention. You should have the opportunity to ask questions and give informed consent.

The area is usually cleansed and marked, and numbing cream may be used depending on the treatment. Many modern fillers also contain local anaesthetic to improve comfort. You may feel pressure, a small pinch or a brief stinging sensation, but treatment is usually quick.

A mirror check during or after treatment can be helpful, although remember that early swelling can make the result look different to how it will look a few days later. Trust the process, take your practitioner’s advice and avoid judging the final outcome in the chair.

Make space for aftercare

Preparation does not end when the appointment begins. Have a gentle evening planned, particularly if you are having lip filler or multiple areas treated. Avoid touching, rubbing or massaging the area unless your practitioner specifically tells you to do so.

You will usually be advised to avoid strenuous exercise, alcohol, excessive heat, saunas and steam rooms for the first 24 to 48 hours. Sleeping with your head slightly elevated on the first night can be more comfortable if you experience swelling. A cool compress may help, but do not apply ice directly to the skin or press firmly on the treated area.

Follow the aftercare instructions you are given rather than relying on general social media advice. Contact your practitioner promptly if you are concerned about increasing pain, unusual discolouration, skin that feels cold, or any symptom that seems out of proportion. With aesthetic treatment, it is always better to ask early.

Choose a practitioner, not just a price

Fillers are an aesthetic treatment, but they require clinical knowledge, careful technique and a strong understanding of facial anatomy. A low price alone should never make the decision for you. Look for a practitioner who offers a consultation, discusses risks as well as benefits, uses reputable products and makes you feel comfortable asking questions.

At Glam Master, filler appointments are approached as a personalised enhancement, with time to discuss the look you want and the treatment that best supports it. Whether you want soft, hydrated-looking lips or elegant facial contour, the aim is confidence that still looks like you.

Give yourself permission to ask for a plan that suits your face, your budget and your diary. The right appointment is not about chasing someone else’s features – it is about stepping out feeling refreshed, refined and ready to enjoy your reflection.

How to Choose Your Hair Extension Method

How to Choose Your Hair Extension Method

A hair transformation should feel glamorous from the salon chair to your next maintenance appointment – not heavy, uncomfortable or difficult to style. If you are trying to choose a hair extension method, the right answer depends on more than the length you want. Your natural hair density, scalp comfort, styling routine, budget and how often you can return for maintenance all matter.

The best extensions blend naturally, move beautifully and fit into your real life. Whether you want a fuller ponytail, mermaid-length waves for a special occasion or a complete everyday confidence boost, a professional consultation helps match the method to your hair rather than forcing your hair to suit a method.

Choose a Hair Extension Method Around Your Lifestyle

Before focusing on the finished look, think about what an ordinary week looks like for you. Do you wear your hair up for work or the gym? Do you wash and heat-style it several times a week? Are you happy to keep up with salon maintenance, or do you need a lower-commitment option?

Permanent and semi-permanent methods can create the most polished, natural-looking result because the extensions are fitted section by section and can be tailored around your parting, face shape and existing layers. They do, however, need careful aftercare and regular refitting as your natural hair grows. If maintenance appointments are difficult to fit around your diary, temporary extensions may be a smarter choice.

Your desired change matters too. Adding subtle fullness usually needs a different amount and placement of hair than adding serious length. A good stylist will assess whether your own hair can comfortably support the weight required for your dream result. More hair is not always better – the aim is a full, luxurious finish that still protects your natural hair.

The Main Hair Extension Methods Explained

Tape-in extensions

Tape-in extensions are applied in neat, flat sandwich sections using adhesive tabs. They are popular for their discreet finish and relatively quick application, especially for clients with fine to medium hair who want fullness without bulky attachment points.

Because the tapes lie flat, they can feel comfortable and blend well when fitted correctly. They need to be moved up as your hair grows, typically every six to eight weeks, and products containing oils or heavy conditioner should be kept away from the adhesive area. Tape-ins suit clients who love a sleek, polished style and are prepared to follow aftercare closely.

Nano ring and micro ring extensions

Nano rings and micro rings attach small extension strands to your natural hair using tiny rings. Nano rings are especially discreet, while micro rings are slightly larger and can be suitable for clients with enough natural hair to conceal the attachment points.

These methods do not rely on heat or glue, which appeals to many clients. They can also be adjusted and refitted during maintenance visits. The trade-off is that they need precise sectioning and regular checking. If you often wear very high ponytails or have exceptionally fine hair around the hairline, your stylist may recommend another option or adjust the placement carefully.

Keratin bond extensions

Keratin bond extensions use individual strands bonded to sections of natural hair with a professional heat application. This creates a beautifully flexible, natural movement, making them a favourite for clients who want a long-lasting, custom-blended transformation.

The bonds are small, so they can be placed strategically for soft layers, added thickness or length. They are not usually reused once removed, meaning they can be a higher-investment choice over time. They also require gentle brushing and a commitment to avoiding conditioner directly on the bonds. For the right hair type and lifestyle, the finish can be exceptionally polished.

Weave or sewn-in extensions

A weave is created by attaching extension hair to a braided foundation or track in the natural hair. This method can provide impressive volume and is often chosen for thicker, stronger hair that can support the technique comfortably.

Weaves can be efficient when adding a substantial amount of hair, but tension must always be assessed properly. They are not automatically the best choice simply because you want maximum volume. A professional should check your scalp sensitivity, hairline condition and natural hair strength before recommending this method.

Clip-in extensions

Clip-ins are temporary pieces that you apply and remove yourself. They are ideal for a party, wedding, holiday or anyone who wants the option of fuller hair without a salon maintenance schedule. They can also be a useful first step if you are unsure how you will feel with longer hair.

The key is correct placement. Clips should not be worn in exactly the same spot every day, and they should be removed before sleeping. While clip-ins offer flexibility, they do not deliver the same continuous, tailored blend as professionally fitted extensions.

Your Natural Hair Comes First

Extensions should enhance healthy hair, not disguise a problem that needs attention. If your hair is very fragile, breaking, heavily bleached or thinning, a responsible stylist may advise a different plan first. This could mean a restorative cut, conditioning treatments, a change in colouring routine or a temporary option while your hair recovers.

Fine hair does not rule out extensions, but it does change the conversation. Lightweight methods, fewer strands and carefully hidden placement may give you a far better result than trying to achieve dramatic length in one appointment. Likewise, very thick hair often needs enough extension hair to blend properly, otherwise the contrast between your natural ends and the added length can look obvious.

Be honest about chemical treatments too. If you colour your hair regularly, use keratin smoothing services or have recently had bleach applied, your extension plan should work around that. Colouring and extensions can look stunning together, but timing and product choice make a real difference to hair condition.

Budget for the Whole Extension Journey

The fitting appointment is only one part of the cost. To choose your hair extension method wisely, ask about the price of the hair, fitting, removal, refitting, replacement hair and the aftercare products that protect your investment.

Reusable methods may cost differently over several appointments compared with single-use bonded strands. A lower initial price is not always the best value if the method does not suit your routine or requires more frequent work than you expected. A clear consultation should give you realistic expectations, not just a tempting first figure.

It is also worth considering the time involved. Some methods take longer to apply, while others need more frequent move-up appointments. The right choice is the one you can maintain comfortably without rushing your hair care.

Questions to Ask at Your Consultation

Bring photos of the kind of length, thickness and colour blend you love, but stay open to expert guidance. The photo may show hair that has been styled, lit and edited, so your stylist can explain what is achievable with your starting length and density.

Ask which method will be gentlest for your hair, how many packs or grams may be needed, how long the appointment will take and when you should return for maintenance. You should also ask how to wash, brush, sleep and heat-style your extensions, plus what signs mean you should contact the salon sooner.

At Glam Master, a hair extension consultation is the place to create a look that feels personal, wearable and beautifully blended. A professional assessment means you can choose your shade, length and method with confidence rather than guessing from a photo online.

Make Your New Hair Easy to Love

Whichever method you choose, your aftercare protects the look. Use a suitable extension brush, start brushing from the ends and work upwards, and hold the roots gently when detangling. Keep rich masks and conditioner away from bonds, rings or tapes unless your stylist advises otherwise, and never sleep with wet hair.

Extensions should feel secure but never painful. Persistent pulling, headaches, itching, slipping or visible attachment points are reasons to contact your stylist promptly. Do not try to remove professionally fitted extensions at home, as this can cause unnecessary breakage.

The most flattering extension method is not necessarily the longest-lasting or the most dramatic. It is the one that suits your hair, your routine and the version of yourself you want to see in the mirror. Book a consultation, be clear about your goals, and let expert advice turn your hair inspiration into a result you can wear with confidence.

Botox Customer Reviews: What Really Matters

Botox Customer Reviews: What Really Matters

A glowing five-star rating can be reassuring, but the most useful Botox customer reviews tell you far more than whether someone liked their appointment. They reveal how the practitioner listened, whether the treatment felt personalised, how the client looked after the results settled, and whether they felt comfortable returning. When you are choosing an injectable treatment, those details matter.

Botox is about refinement, not changing your face beyond recognition. The right treatment can soften the appearance of expression lines and help you look fresher, more rested and still completely like yourself. Before booking, take a closer look at what real clients are saying – then bring your questions to a proper consultation.

What Botox customer reviews should actually tell you

The strongest reviews are specific. Rather than simply saying “love my Botox”, look for comments about the whole experience: the consultation, the practitioner’s approach, the atmosphere, aftercare and the final result. A client who says they felt heard when discussing forehead lines, frown lines or crow’s feet gives you a clearer picture than a quick rating alone.

Pay attention to language around natural-looking results. Many people worry that Botox will make them look frozen or unable to move their face. A skilled practitioner should discuss your desired level of movement and assess your facial expressions before treatment. Clients may want a smooth, polished look for an event, while others prefer a softer result that simply takes the edge off visible lines. Neither preference is wrong, but the treatment plan should reflect it.

Reviews can also show whether a clinic takes the time to manage expectations. Botox does not produce its final effect immediately. Clients commonly start to notice changes over several days, with results usually developing over around two weeks. A responsible review may mention being advised to wait before judging the outcome, rather than expecting an instant transformation on the day.

Look for personalised care, not one-size-fits-all treatment

Every face moves differently. The amount and placement of Botox suitable for one person may not be right for another, even if they are the same age or have similar lines. Good reviews often mention that the appointment did not feel rushed and that the practitioner explained what could realistically be achieved.

That is particularly valuable if it is your first time. You may arrive thinking you need treatment across several areas, then find that a more subtle approach suits your face and budget better. Equally, someone returning for maintenance may already know the finish they prefer. The best aesthetic appointments leave room for both conversations.

Look for feedback that describes a practitioner as honest. You want someone who can say yes when a treatment is suitable, but who is also willing to advise waiting, reducing the amount used or considering another option when necessary. An injector who prioritises a balanced result over selling the largest possible treatment is worth noticing.

Details that make a review more credible

Reviews do not need to be long to be useful, but the most credible ones often include a few practical details. They may mention the area treated, such as the forehead or frown lines, whether it was a first appointment or a top-up, and how they felt once the result had settled. A comment about clear aftercare or a follow-up plan is also encouraging.

It helps when reviews acknowledge that treatment is personal. For example, a client may say they wanted their frown lines softened while keeping natural brow movement. That is much more informative than a promise of perfection. Cosmetic treatments involve individual anatomy, muscle activity and preferences, so results can vary.

Photos can add context, but assess them carefully. Lighting, make-up, facial expression and angles can all make a big difference. The most meaningful before-and-after images are consistent in lighting and positioning, and show a relaxed face as well as expression where appropriate. They should support, rather than replace, a proper consultation.

Red flags to keep in mind before you book

A high number of reviews is not the only thing that matters. Read a mix of recent comments and look for patterns. Are clients repeatedly praising clean surroundings, professional advice and a comfortable manner? Or do reviews focus only on bargains, with no mention of the practitioner, consultation or aftercare?

Be cautious if a clinic appears to promise that every client will get identical results, zero movement or a completely risk-free experience. No injectable treatment is suitable for everyone, and any responsible provider should discuss potential side effects, relevant medical history and when treatment should be postponed. Mild redness, swelling or bruising can occur after injections, and your practitioner should explain what is normal and when to contact them for advice.

It is also sensible to step back from reviews that make dramatic claims without any detail. Botox can be an excellent option for the right person, but it is not a replacement for a healthy skincare routine, sun protection or professional medical advice. A trustworthy aesthetic provider will keep the conversation realistic.

Questions reviews cannot answer for you

Even the best Botox customer reviews cannot tell you whether Botox is right for your individual features or goals. That is what a consultation is for. Use what you have read to shape your questions.

Ask who will carry out the treatment, how they assess facial movement, what result they would recommend for your concerns, and how long you should expect your results to last. Ask about aftercare too. You may be advised to avoid rubbing the treated area, strenuous exercise, alcohol and lying flat for a period after your appointment, depending on the practitioner’s guidance.

If you are planning treatment before a wedding, holiday, birthday or big night out, do not leave it until the last minute. Give yourself enough time for the result to settle and for any temporary redness or bruising to resolve. First-time clients especially benefit from planning ahead rather than booking under pressure.

Pregnancy, breastfeeding, certain health conditions, allergies, medications and previous aesthetic treatments can affect whether treatment is appropriate. Be open during your consultation. It is not about being judged – it is how your practitioner protects your safety and helps you make an informed decision.

Choosing Botox with confidence in Manchester

For clients who want beauty maintenance and advanced aesthetics in one place, convenience is a real benefit. You might book a facial, lashes or hair appointment around your diary, but Botox deserves its own considered consultation. Give yourself the same care you would when choosing a new hair colour or a major skin treatment, only with an even sharper focus on expertise and suitability.

At Glam Master, the aim is to make your appointment feel clear, comfortable and tailored to your look. Whether you want a subtle refresh or are considering Botox for the first time, start with a conversation about your goals, facial movement and the finish you want to achieve. You should never feel pressured to have more treatment than you need.

The review that matters most is the one you will be able to write after feeling listened to, well informed and happy with a result that still feels like you. Book a consultation when you are ready to ask the right questions and choose your treatment with confidence.

Masseter Botox Before After Results Explained

Masseter Botox Before After Results Explained

A strong, square jaw can look beautifully defined, but when the masseter muscles are overworked, it can also make the lower face appear wider or create uncomfortable clenching. Masseter Botox before after results can be striking, but they are not an overnight face change. The treatment works gradually, with results shaped by your muscle strength, facial structure, dose and treatment goals.

For clients who want a softer lower-face contour, less jaw tension or support with teeth grinding, this is a precision treatment that deserves a proper consultation. The best result is not a copy of someone else’s before-and-after photo. It is a balanced, natural-looking change that still looks like you.

What does masseter Botox actually do?

The masseter is the powerful chewing muscle at the back of each jaw. It can become enlarged through genetics, regular gum chewing, jaw clenching or bruxism, which is the habit of grinding teeth. Botulinum toxin injections temporarily reduce the muscle’s activity. Over time, a less active muscle may reduce in bulk, creating a more tapered appearance through the lower face.

For some clients, the aesthetic benefit is a subtly slimmer jawline. For others, the biggest difference is functional: less tension on waking, fewer clenching episodes and reduced facial soreness. These goals often overlap, but they are not the same thing. If tooth grinding is affecting your teeth, gums or sleep, it is sensible to speak to your dentist too. Botox may help muscle tension, but it does not replace dental care or a night guard where one is needed.

Masseter Botox before after: when will you see a change?

The first thing to know is that there are two timelines. Muscle movement begins to reduce before the face visibly changes. A good practitioner will set this expectation from the start, rather than promising a dramatic result by the weekend.

The first few days

You may notice mild tenderness, tiny injection marks or a small amount of swelling around the jaw. This usually settles quickly. Most people can return to normal daily plans straight away, although it is wise to give your face a little breathing room and follow your aftercare advice.

Around two weeks

This is often when reduced clenching or a lighter feeling in the jaw becomes more noticeable. A review may be recommended depending on your treatment plan. The visual change may still be subtle because the masseter muscle needs time to reduce in size.

Four to eight weeks

This is the stage where many masseter Botox before-after comparisons begin to show a clearer contour change. The lower face can look less broad from the front and more refined in photographs, particularly if enlarged masseters were a major contributor to the jaw shape.

Three to six months

Results vary, but the effects are temporary and maintenance appointments are usually needed to retain them. People with very strong masseter muscles may need a different plan from someone seeking a small, softening adjustment. Your practitioner should assess results conservatively and adjust only where appropriate.

Why before-and-after photos can look very different

A before-and-after image can be useful, but it cannot tell the whole story. Lighting, head position, facial expression, weight changes and even how tightly someone is clenching can alter the appearance of the jaw. The most reliable comparison uses photos taken at the same angle, in similar light and with the jaw relaxed.

Your natural bone structure matters too. Masseter Botox can reduce muscular width, but it does not change the jawbone, remove fat or tighten loose skin. If a wide lower face is mainly caused by bone structure, jowls or fullness under the chin, another treatment approach may be more suitable. This is why a consultation should focus on your face, not a one-size-fits-all trend.

Is masseter Botox right for your goals?

This treatment can suit clients who feel their jaw looks bulky due to strong chewing muscles, clench during stressful periods, grind their teeth, or want a gentler V-shaped lower-face contour. It can be especially appealing if you want a non-surgical option with minimal downtime and a natural progression rather than an instant, obvious transformation.

It is not ideal for everyone. If your main concern is skin laxity, a weak chin, pronounced jowls or facial volume loss, relaxing the masseters may not give the effect you have in mind. In some faces, over-treating this area can make the lower face look less supported. A responsible practitioner will sometimes advise against treatment, recommend a lower dose or suggest waiting until a clearer plan is in place.

Pregnancy and breastfeeding, certain neurological conditions, active skin infections and some medications may mean treatment should be postponed or avoided. Always share your complete medical history, allergies and dental concerns during your consultation.

What happens at a masseter Botox appointment?

Your appointment should begin with an assessment of your jaw at rest and while clenching. The practitioner will check the size and movement of each masseter muscle, discuss any history of jaw pain or grinding, and talk through the result you want. This is the time to be honest about whether you want facial slimming, clenching relief or both.

The injections themselves are quick. Small amounts of product are placed into carefully selected points in each masseter. Precision matters because the jaw contains several muscles, and placement needs to support natural expression and function. You should never feel rushed into treatment or pressured to have more units than your assessment calls for.

At Glam Master, a consultation can help you understand whether masseter Botox fits your face, lifestyle and goals before you commit. A tailored plan is far more valuable than choosing treatment based on a filtered social media photo.

Possible side effects and the trade-off to consider

Masseter Botox is commonly performed, but it is still a medical aesthetic treatment and should be carried out by an appropriately qualified practitioner. Common short-term effects include tenderness, bruising, slight swelling or a headache. These are usually temporary.

Less commonly, people can experience temporary chewing fatigue, an uneven smile or facial asymmetry if the product affects nearby muscles. This is one reason a cheap, high-dose offer is not a good reason to choose a provider. The aim is to relax the muscle enough to meet your goals while preserving comfortable chewing and balanced facial movement.

Ask who will perform your treatment, how your suitability is assessed, what product is being used and what support is available if you have a concern afterwards. Clear answers are part of a quality aesthetic experience.

Aftercare for the best possible result

Follow the specific advice given at your appointment, as it may differ depending on your treatment. In general, avoid rubbing or pressing firmly on the injection area straight afterwards. Keep exercise, alcohol, heat treatments and facial massage on hold for the period advised by your practitioner, and avoid booking a deep facial massage immediately after your injections.

Try not to judge your result too early. Take relaxed, consistent photos before treatment and again at four, eight and twelve weeks if you want to track your progress properly. If you clench at night, manage stress where possible and continue any dental advice you have been given. Your jawline treatment works best as part of a plan that looks after the cause of the tension as well as the visible effect.

The most flattering masseter Botox result is usually the one that makes friends say you look rested, rather than asking what you had done. Book a consultation when you are ready to discuss your jaw concerns openly, set realistic expectations and choose a result that feels polished, confident and completely your own.

Hair Colour Correction: What Your Hair Needs

Hair Colour Correction: What Your Hair Needs

That orange band around your roots, box-dye black that suddenly feels far too dark, or blonde that has turned yellow after a few washes can make you want an instant fix. Hair colour correction is the professional route back to a shade that looks intentional, polished and right for you – without taking unnecessary risks with your hair’s condition.

The best results are never about simply putting another colour on top. They come from understanding what is already in the hair, choosing the right route forward and being realistic about the journey. Sometimes that means a gorgeous transformation in one appointment. Sometimes it means a carefully planned series of appointments that keeps your hair looking beautiful at every stage.

What is hair colour correction?

Hair colour correction is a tailored salon service used to improve an unwanted, uneven or unsuitable colour result. It may involve lifting artificial colour, neutralising brassiness, softening harsh regrowth, filling overly light hair before going darker, blending patchy areas or restoring a more natural-looking finish.

There is no single correction formula because every head of hair has a different history. A client who has used a dark home dye for years needs a very different approach from someone with fresh highlights that have gone too warm. Your natural base, previous colour, bleach history, hair thickness and condition all affect what can be achieved safely.

This is why a professional stylist will look beyond the colour you can see in the mirror. They will assess the underlying pigments in your hair and the likely result of each colour process before beginning. It is the difference between a quick cover-up and a colour that genuinely looks considered.

Start with a proper colour consultation

A consultation is not an optional extra when correcting colour. It is where the safest, most flattering plan begins. Bring inspiration pictures if you have them, but also be ready to explain exactly what you have used on your hair over the last few years, including home dyes, toners, henna, colour-depositing masks and previous salon work.

Honesty matters here. Certain products can react unpredictably with lightening services, while layers of dark dye may need time and multiple stages to lift evenly. A stylist is not judging your hair history – they are protecting your hair and planning the result you want.

A strand test may be recommended, especially if your hair has been coloured at home, bleached repeatedly or feels dry and fragile. This small test gives valuable information about how your hair will lift, how the tone will develop and whether it is ready for the planned service.

At Glam Master, a colour consultation is your chance to discuss the finish you want, whether that is brighter blonde, richer brunette, a softer balayage blend or a complete reset after a colour mishap. You should leave knowing the likely process, the level of maintenance involved and whether your goal is realistic for your current hair.

The most common colour problems and how they are corrected

Brassiness and unwanted warm tones

Brassy hair is one of the most common reasons clients book a correction. Blonde, highlighted and light brown hair can reveal yellow, gold or orange tones as a toner fades, particularly if the hair has been lifted from a naturally darker base.

The right fix depends on the warmth present. Pale yellow often needs a violet-based toner, while stronger orange tones may need blue or ash tones. If the hair has not been lifted light enough, toner alone cannot create an icy blonde. Further lightening may be needed first, provided the hair is in good enough condition.

Colour that is too dark

Going darker can feel glamorous until black or deep brown looks flat, harsh or unlike the shade you had imagined. Removing dark artificial colour is one of the more complex correction services, particularly where permanent box dye has been applied several times.

A stylist may use a colour remover, gradual lightening techniques or carefully placed highlights to break up the darkness. Expect warm red, copper or orange undertones to appear during this process. They are not necessarily a mistake – they are part of the pigment journey and may need to be refined over more than one visit.

Patchy colour, bands and uneven roots

Uneven colour often happens after home bleaching, overlapping lightener or applying different shades over time. You might have a bright root area, a darker middle band and lighter ends, or highlights that look stripy rather than blended.

Correcting this needs precision. Your stylist may add lowlights to create depth, lighten selected dark areas, root-smudge for a softer transition or tone the whole result to bring the shades together. The aim is usually dimension rather than one flat block colour, as this gives a more natural and forgiving grow-out.

A shade that does not suit you

Not every colour disaster is technically bad colour. Sometimes the finish is even and glossy but simply too warm, too cool, too intense or too dark against your skin tone. This can often be a more straightforward correction, using a gloss, toner or carefully chosen all-over colour to rebalance the result.

Your lifestyle matters too. A high-maintenance platinum blonde may look incredible but needs regular toning, careful home care and root appointments. A lived-in blonde, soft brunette or dimensional balayage can offer a glamorous change with less pressure between salon visits.

Can every correction be done in one appointment?

It depends on your starting point and the condition of your hair. A toner adjustment or a blend of lowlights may be completed in one visit. Moving from heavily dyed black to a bright, cool blonde is a much bigger project and should never be rushed just to meet a deadline.

Trying to force hair through too much lightening can lead to breakage, rough texture and a result that will not hold tone well. A skilled stylist may recommend a staged plan, taking you gradually lighter while keeping the hair healthy and wearable. You can still leave each appointment with a beautiful colour – just not always the final dream shade immediately.

If you are preparing for a wedding, holiday or major event, arrange your consultation as early as possible. That gives you more choice, more time for conditioning treatments and a better chance of reaching your goal safely.

How to prepare for your appointment

Arrive with dry hair and avoid using heavy oils, temporary root sprays or colour-depositing products immediately beforehand unless your stylist has advised otherwise. Take clear photos in daylight of the colour you have now, especially if you are booking a consultation before the service.

Do not attempt another home fix in the days before your appointment. Even a seemingly harmless purple shampoo, toner or supermarket dye can alter the plan and make the correction more difficult. If you are unhappy with your colour, pause and get professional advice before adding anything else.

It also helps to wear a top that makes you feel good. Colour consultations are about more than technical details – seeing the proposed shade against your usual style and complexion helps you decide what will make you feel your best.

Keep your corrected colour looking fresh

Once your colour has been corrected, home care protects the investment. Use salon-recommended shampoo and conditioner suited to your shade and hair condition, and keep heat styling controlled with a heat-protection product. Blonde and cool-toned brunette shades may benefit from occasional purple or blue shampoo, but overusing it can leave hair dull or overly muted.

Hydration is equally important after lightening. Alternate moisture-focused care with strengthening treatments if advised, and book trims when your ends need attention. Chlorine, sea water, hard water and frequent high-heat styling can all shift tone or dry the hair, so a gloss or toner refresh between larger colour appointments can be a smart way to maintain shine.

Your stylist can also guide you on realistic maintenance. Some shades need a refresh every few weeks, while others are designed to grow out softly over months. The best colour is not only the one that looks amazing on appointment day – it is the one that works with your time, budget and hair goals.

If your colour has gone wrong, resist the urge to keep correcting it at home. Book a consultation, share your full colour history and give your hair the expert care it deserves. A calm, considered plan can turn an unwanted result into the fresh, confident look you were hoping for.

Laser Versus Electrolysis Hair Removal Compared

Laser Versus Electrolysis Hair Removal Compared

That daily shave before a night out, the ingrown hairs after waxing, the shadow that returns far too quickly – unwanted hair can take more time and confidence than it deserves. When comparing laser versus electrolysis hair removal, the best choice is not simply the one that sounds most permanent. It is the treatment that suits your hair, skin, treatment area, budget and the results you want to see.

Both options can dramatically reduce the need for razors, waxing strips and last-minute salon appointments. They work in very different ways, though, which is why a proper consultation matters before you commit to a course.

Laser versus electrolysis hair removal: the key difference

Laser hair removal uses concentrated light energy to target pigment in the hair. The heat travels down the hair shaft to the follicle, helping to disrupt future growth. Because the laser can treat many hairs at once, it is a popular choice for larger areas such as the legs, underarms, bikini line, back and chest.

Electrolysis treats one follicle at a time. A very fine probe is placed into the natural opening of the hair follicle, then a small electrical current destroys the growth cells. This makes electrolysis highly precise and suitable for individual hairs, including pale, grey, white, red or very fine hairs that laser may not recognise effectively.

In simple terms, laser is usually the faster route for reducing a large amount of dark, coarse hair. Electrolysis is the detail-focused option for permanently treating individual follicles. Many clients find that the most effective plan can involve both: laser for broad clearance, followed by electrolysis for the remaining lighter or more stubborn hairs.

How laser hair removal works

Hair grows in cycles, and laser is most effective when a hair is in its active growth stage. Not every follicle is active at the same time, so treatments are spaced over several weeks to catch new groups of hairs as they enter that phase.

A course is normally recommended rather than a single appointment. The exact number of sessions depends on the area, hair density, hormone levels and how your body responds. Underarms and lower legs may respond relatively quickly, while facial hair and bikini hair can be more influenced by hormones and may need ongoing maintenance.

Who laser suits best

Laser usually performs best where there is a clear contrast between the hair and surrounding skin, particularly dark, visible hair. The technology and settings used should always be selected with your skin tone and hair type in mind. A consultation and patch test help assess suitability and support a safe, tailored treatment plan.

Laser does not work equally well on every hair colour. Blonde, grey, white and red hairs contain little or no pigment for the laser to target. If those are the hairs bothering you most, electrolysis may be the more worthwhile investment.

What laser feels like

Most clients describe laser as a quick warmth or an elastic-band flick against the skin. Sensation varies by body area, with the upper lip and bikini line often feeling more sensitive than legs or arms. Modern cooling methods can make appointments far more comfortable, and sessions are usually quick for smaller areas.

You may notice temporary redness or mild warmth afterwards, much like skin after a short spell in the sun. Your practitioner will give you aftercare guidance, which commonly includes avoiding heat, sun exposure, fragranced products and vigorous exercise for a short period.

How electrolysis hair removal works

Electrolysis does not rely on hair pigment. Instead, it reaches the follicle directly, which is why it can treat hairs of any colour and works across skin tones. Each hair is treated individually and removed with tweezers once the follicle has been treated.

There are different electrolysis methods, but the common aim is the same: disable the follicle so that it cannot produce another hair. A follicle that has been effectively treated will not regrow hair. However, because follicles work on different growth cycles, repeated appointments are still needed to treat hairs as they become visible.

Who electrolysis suits best

Electrolysis can be an excellent option for small, detailed areas. Think chin hairs, upper lip hairs, stray brow-area hairs, fingers, toes, the navel line or a few persistent hairs left after a laser course. It is also a strong choice for clients with light hairs who are frustrated that other hair-removal methods offer only temporary results.

For larger areas with dense hair growth, electrolysis can be time-consuming. Treating every follicle on both full legs, for example, would involve many hours over an extended period. That does not make it the wrong choice, but it does mean clients should go in with realistic expectations about time and cost.

What electrolysis feels like

The sensation is often described as a brief heat, pinch or tiny sting in each follicle. Comfort depends on the treatment area, the thickness of the hair, your personal sensitivity and the length of the appointment. Because electrolysis is precise and slow, it is particularly useful when every individual hair matters.

After treatment, small red bumps or slight swelling can occur around treated follicles. These usually settle, but good aftercare is essential. Avoid picking, touching or applying heavy makeup to the area straight away, especially after facial treatment.

Results, permanence and realistic expectations

This is where the wording matters. Laser hair removal is generally described as long-term hair reduction. Many clients see significantly slower, finer and sparser regrowth after a course, then choose occasional top-up sessions to maintain their smooth result. It can be a huge convenience upgrade, but it is not a promise that every hair will disappear forever.

Electrolysis is recognised as a permanent hair-removal method because it treats each follicle directly. Still, permanent does not mean one appointment and done. New hair can become visible from follicles that were dormant during earlier sessions, and hormonal changes can stimulate new growth over time. Polycystic ovary syndrome, pregnancy, menopause and certain medicines can all affect hair patterns.

The honest answer is that results depend on consistency. Skipping appointments, shaving or plucking against your treatment plan, or expecting a single session to resolve years of hair growth will slow the process. A professional treatment plan should feel achievable around your routine, not like another source of pressure.

Which treatment is better for each area?

For broad areas with dark hair, laser is often the practical choice because it treats more ground in less time. Legs, underarms, standard bikini areas and larger body zones are common examples. It is ideal for clients who want to cut down the regular effort of shaving or waxing before holidays, gym sessions and special events.

For a small number of hairs, particularly if they are light or grey, electrolysis is often more effective. It can give precision where laser cannot. Facial hair is the area where the decision most often depends on the individual: dark, coarse facial hair may respond well to laser, while isolated pale chin hairs are better suited to electrolysis.

If you are concerned about hormonal facial hair, seek a consultation rather than choosing based on a social-media before-and-after. Your practitioner can discuss what is realistic, whether your hair pattern suggests a hormonal factor, and which route offers the best value over time.

Cost and time: look beyond the single session price

Laser sessions may cost more than a short electrolysis appointment, but the area is treated much faster. Electrolysis can appear affordable session by session, yet become a bigger commitment if you are treating a large, dense area. The smarter comparison is the total plan: how many sessions you may need, the size of the area, the likely maintenance and the result you are trying to achieve.

Avoid choosing solely on the cheapest advertised price. Safe, effective hair removal requires trained practitioners, appropriate technology, a consultation, patch testing where needed and clear aftercare. Your skin deserves more than a rushed bargain.

Prepare for a better treatment experience

For laser, you will usually be asked to shave the treatment area shortly before your session and avoid waxing, threading or plucking during the course, as the follicle needs to be present for the laser to target it. Limit sun exposure and avoid fake tan before treatment, as both can affect safety and settings.

For electrolysis, the hair normally needs enough length for the practitioner to remove it after treatment. Avoid plucking between sessions, and arrive with clean skin free from heavy lotions or makeup where possible. Your clinician will confirm the exact preparation for your chosen area.

A consultation at Glam Master can help you move past guesswork and build a hair-removal plan around your skin, hair and lifestyle. Whether you want smoother legs with less upkeep or confidence without those stubborn facial hairs, choose the treatment that makes your routine feel lighter – then give it the consistency it needs to work.